Display and control
All clients read the same device information and follow the same principles:
- the main screen shows the setpoint, the room temperature, the mode and a status;
- the mode is a pill: a tap opens the mode choice;
- fan, swing and humidity are under More settings and only appear if the device offers them;
- the dial is an almost closed arc; in
automode it carries two handles and two pairs of − / + buttons; - when the two setpoints are at the minimum gap, the inner buttons are refused and the screen says “Minimum gap 2°”.
Colours have a meaning: yellow when the unit is heating, cyan when cooling, amber when waiting, red when offline; a stopped, unknown or idle unit stays neutral.
Displayed status
| Status | Meaning |
|---|---|
| Heating, Cooling, Drying, Fan | the current action reported by the unit or the thermostat |
| Idle | the unit is on but doing nothing for now |
| Starts in N min | a wanted output waits for the end of its minimum off time |
| Offline | the relayed unit is unreachable (ESPHome disconnected) |
| Sensor silent, Sensor disconnected, Waiting for the sensor, Sensor missing, Sensor out of range | thermostat safety: see Internal thermostat |
| Humidity too high, Humidity sensor silent | floor cooling cut (dew point) |
| Stopped | off mode |
| Unknown mode | the device has not received any mode yet: see Troubleshooting |
Web app
Climates are rows in the room list: a mini dial, the name, the status, the setpoint, the room temperature.
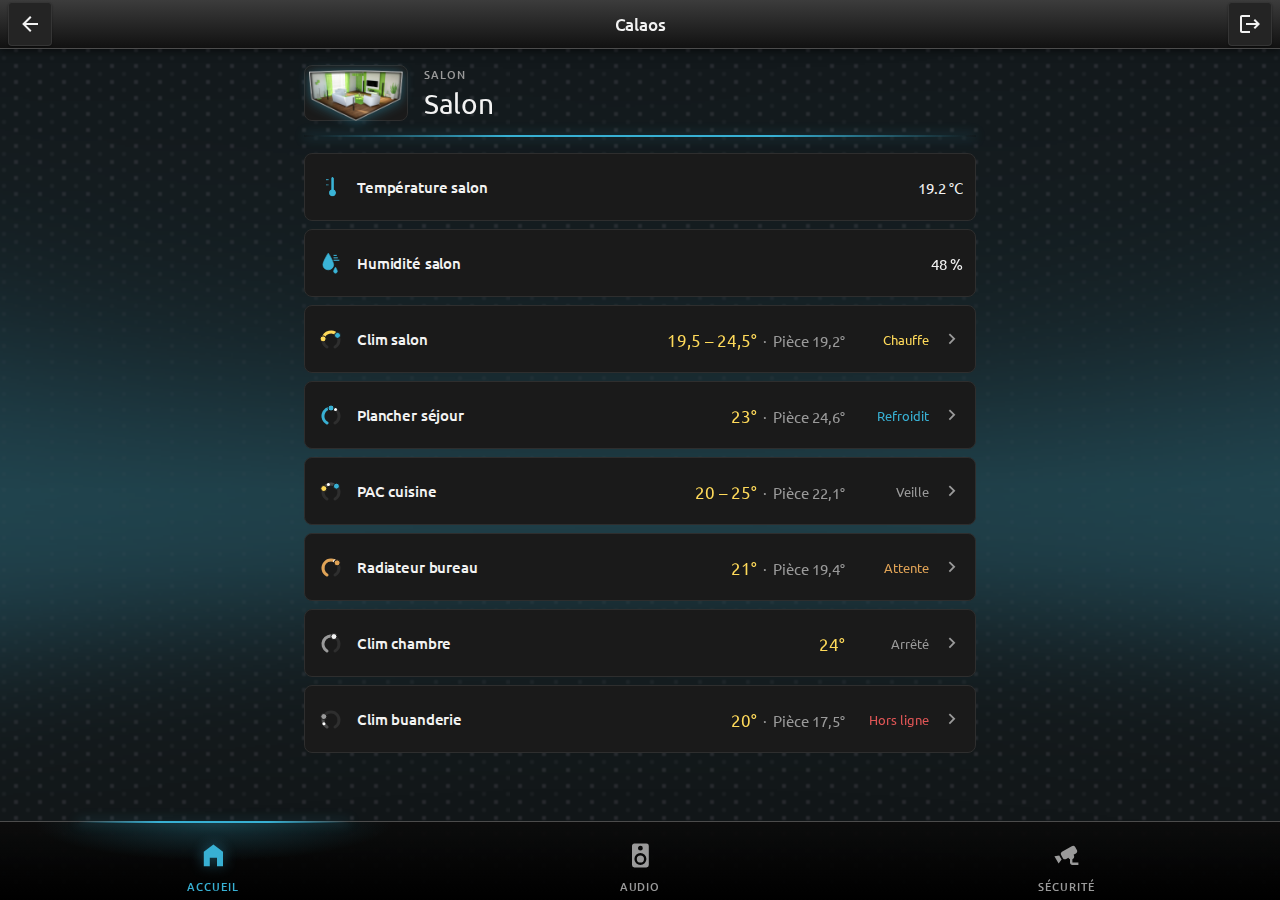 One row per device: here a unit heating, a floor cooling, a heat pump idle, a radiator waiting, a stopped unit and an offline unit.
A click on a row opens the settings panel on the right of the screen (below 1024 px wide, a centred window). You set the setpoint with the − / + buttons, and see the status and the room temperature.
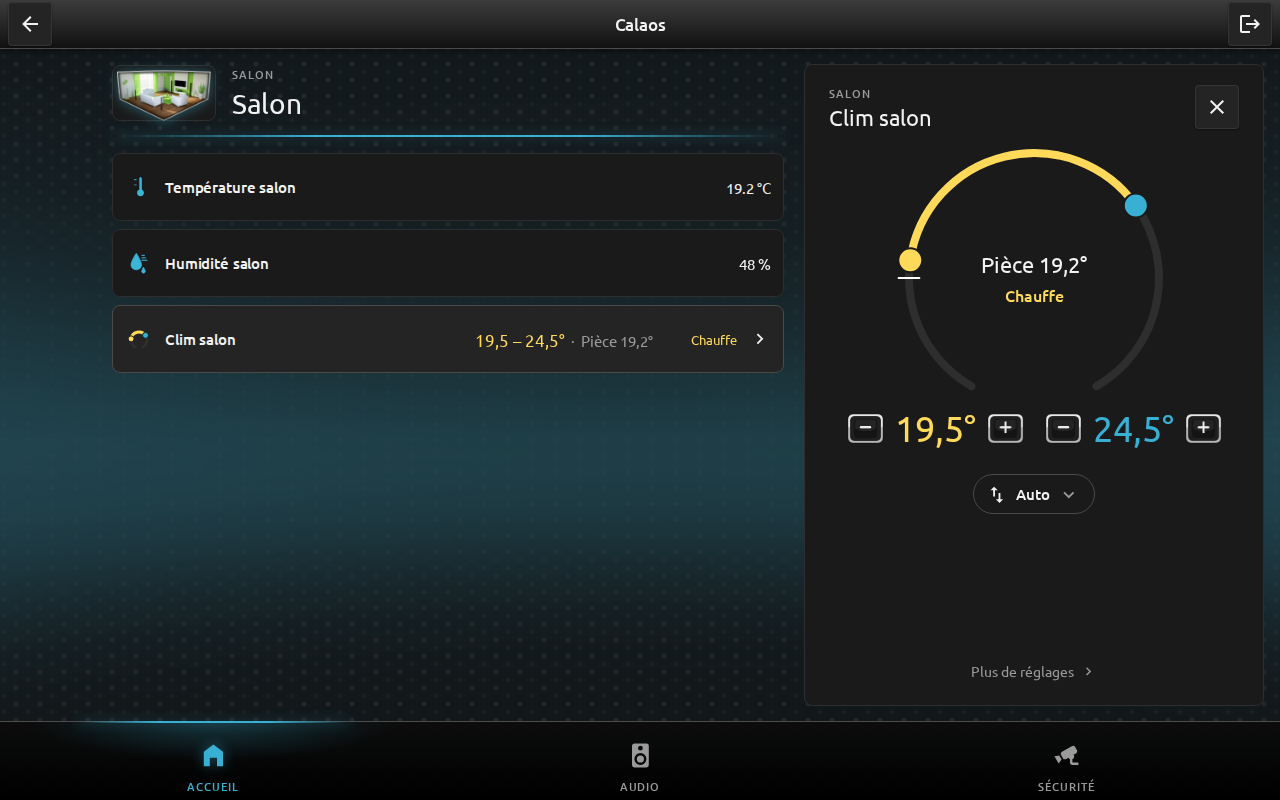 A unit in auto mode: two setpoints, 19.5° and 24.5°.
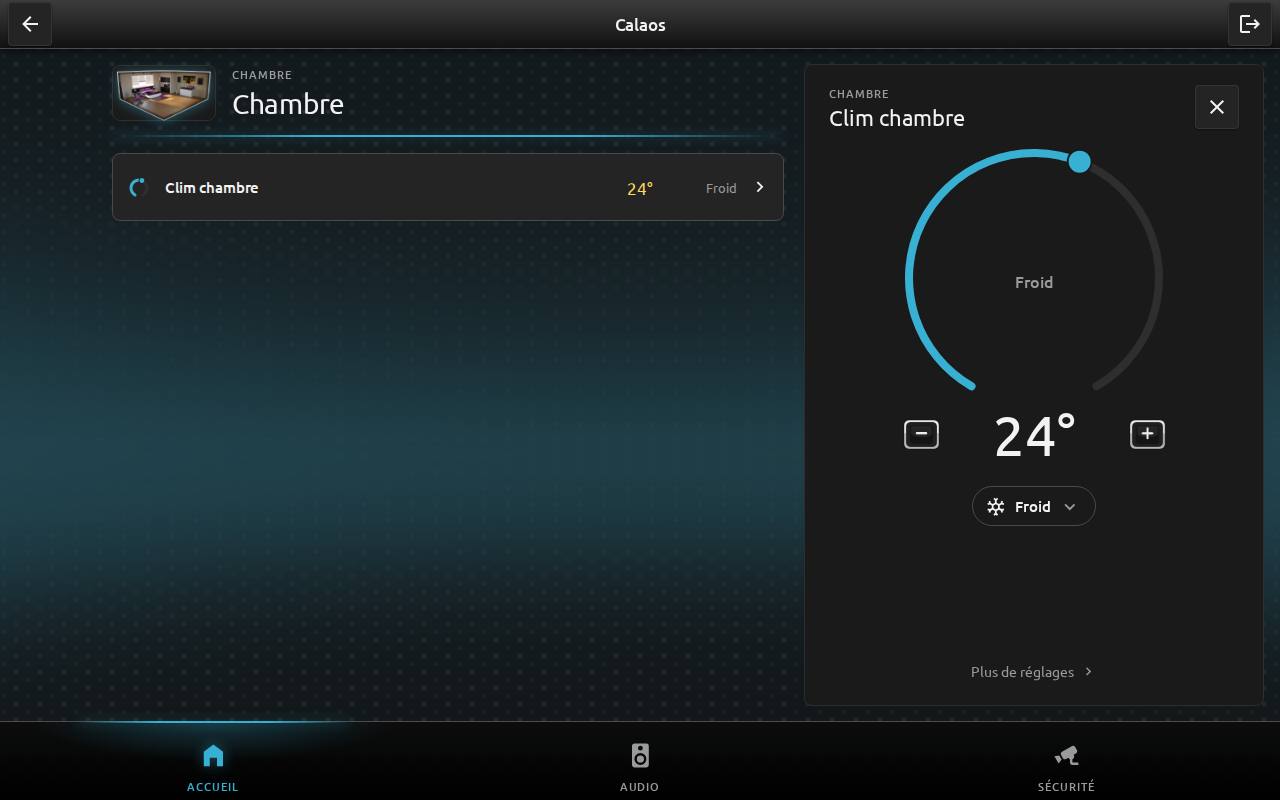 A single-setpoint unit, in Cool mode.
The mode pill opens the mode choice, and More settings opens fan, swing and humidity.
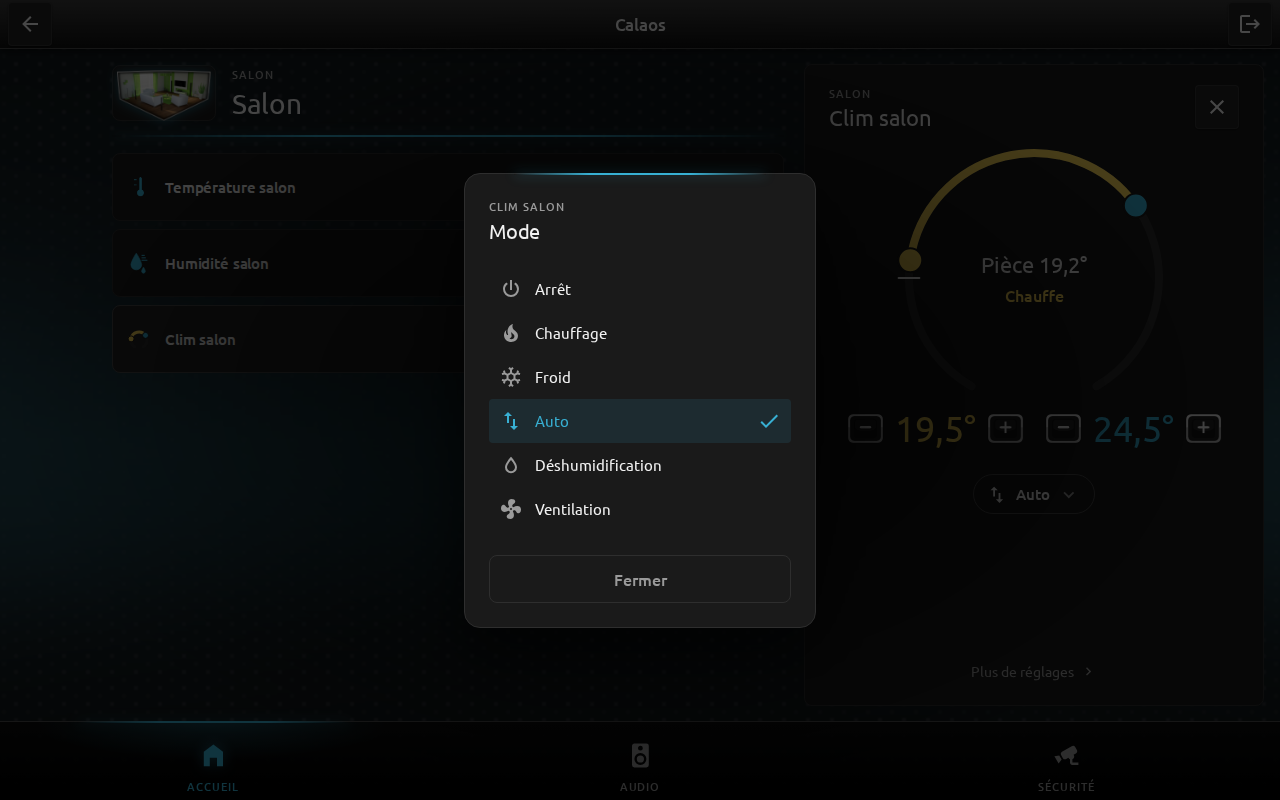 The mode choice: only the modes the device offers appear.
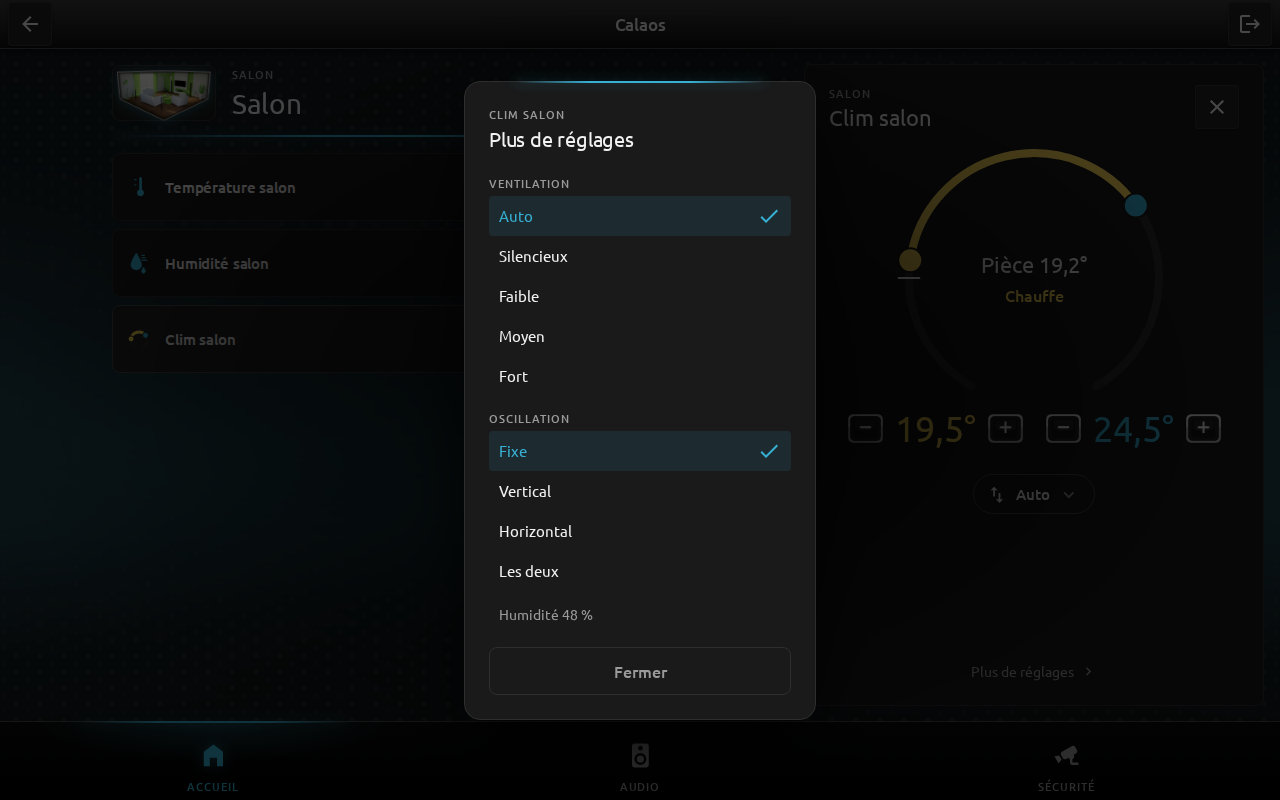 More settings: fan, swing, humidity.
An internal thermostat looks the same; only the modes it has are offered.
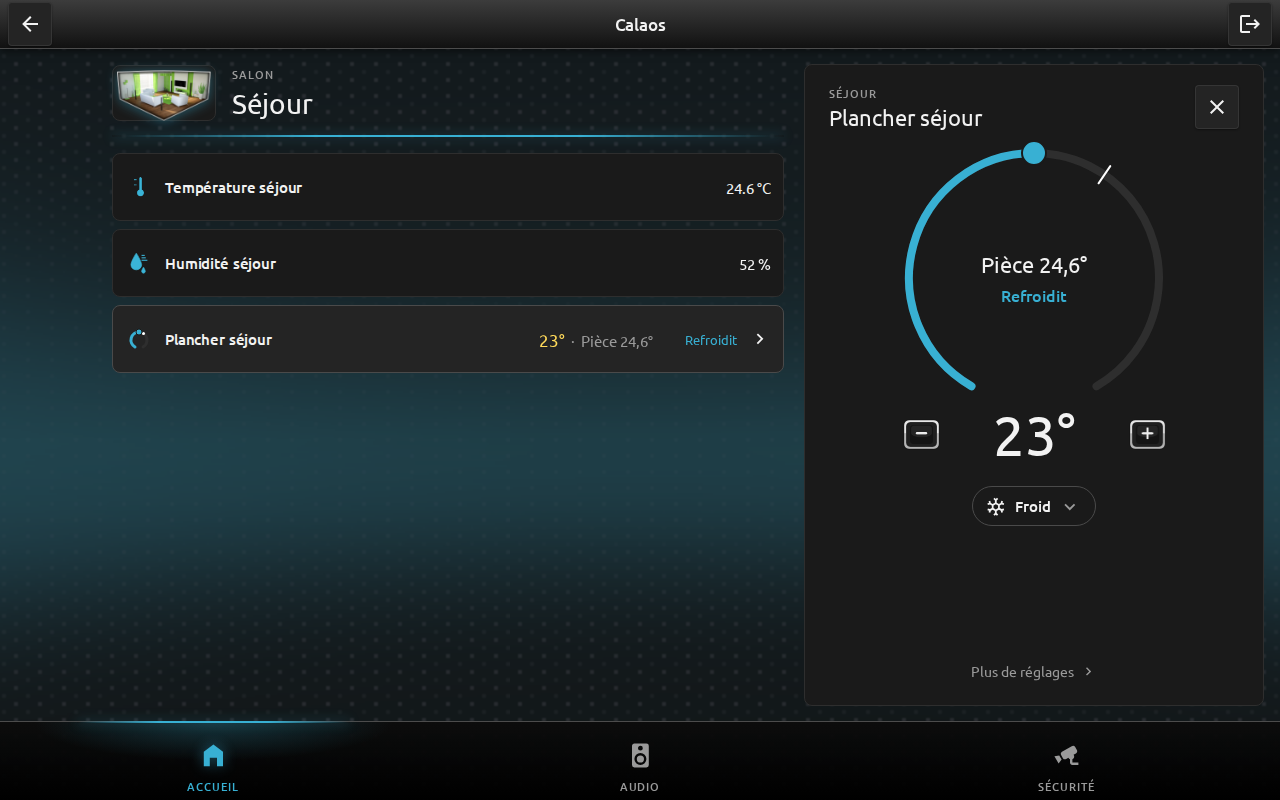 The lounge floor, cooling.
The minimum gap between the two setpoints is enforced on screen:
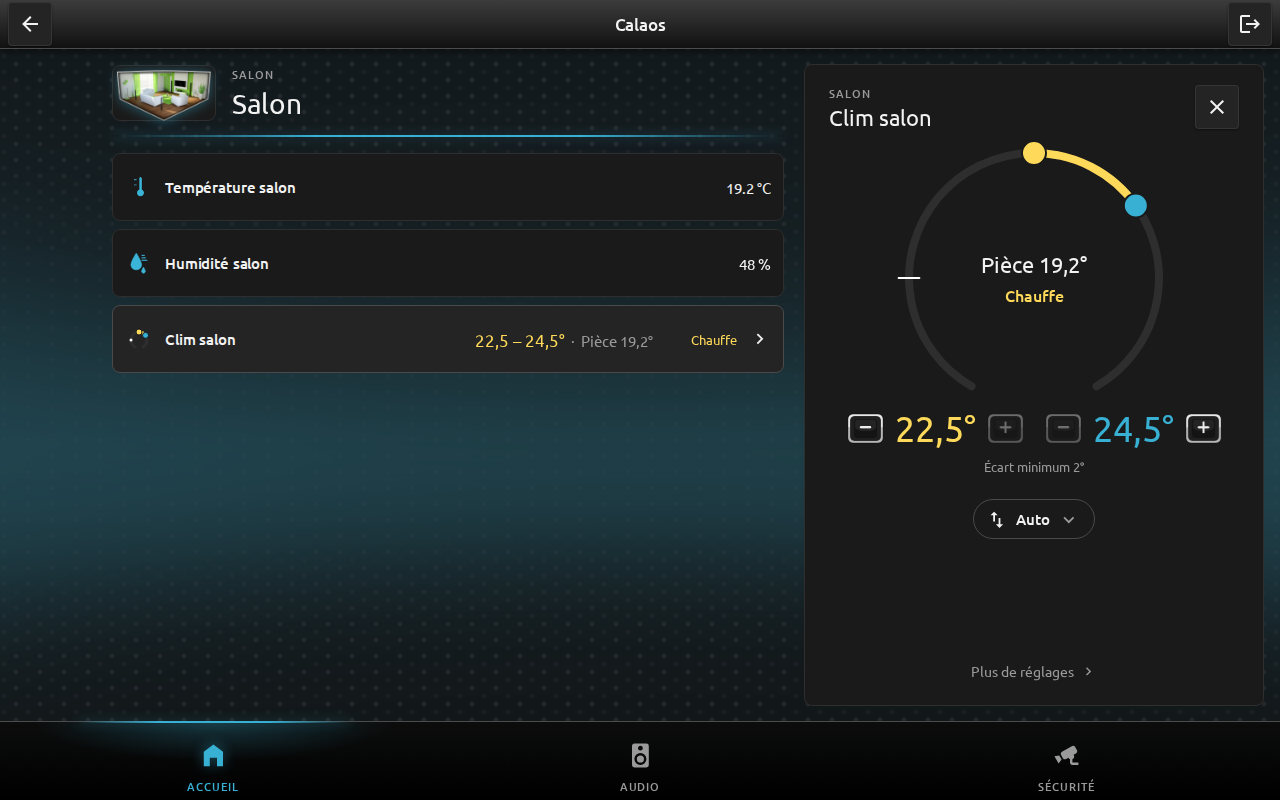 The inner buttons are refused when the minimum gap is reached.
A safety fault shows in the row and in the panel, in red:
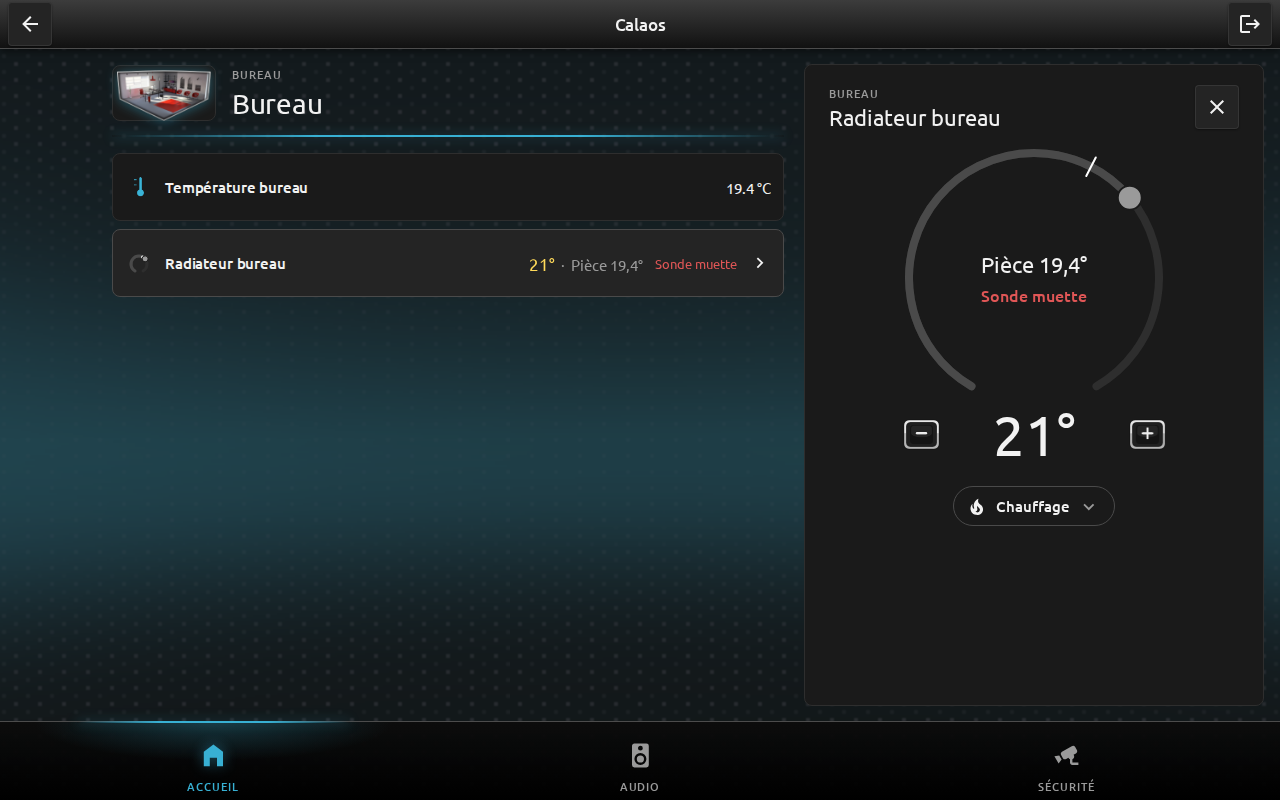 A radiator whose sensor is silent: heating is cut, the setpoint stays adjustable.
Mobile app
On a phone the list shows for each climate the name (yellow when the unit is active), the room temperature, the mode pill, the status and the setpoint (“19.5 – 24.5°” in auto).
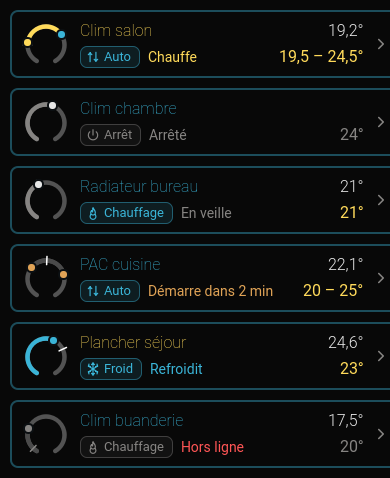 The list on a phone: one climate per status.
A tap opens a settings sheet at the bottom of the screen (on a computer, a dialog).
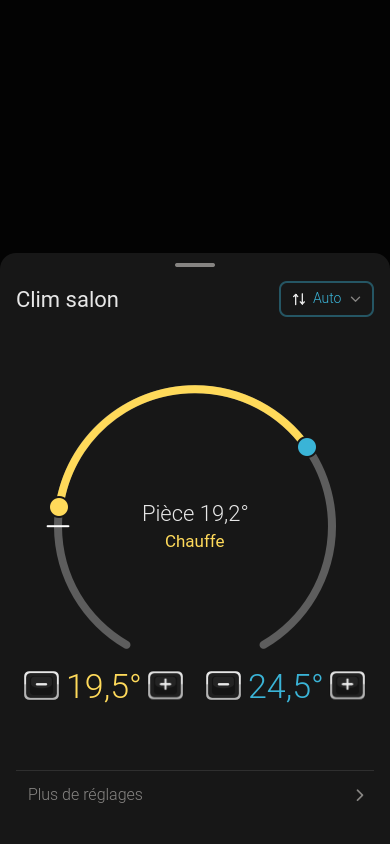 Settings of a unit in auto mode.
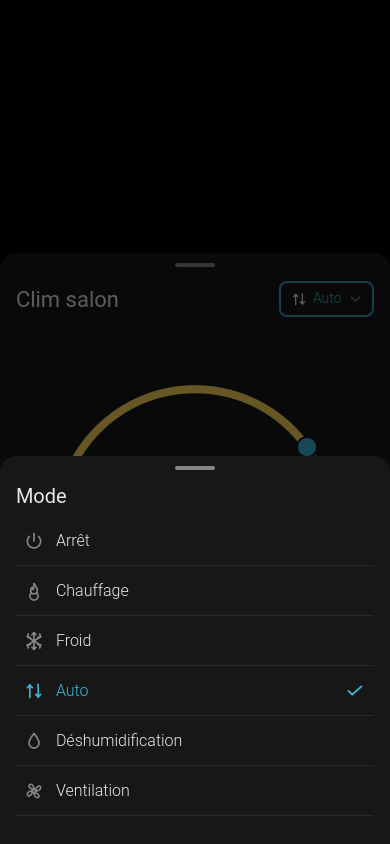 The mode choice, on top of the settings.
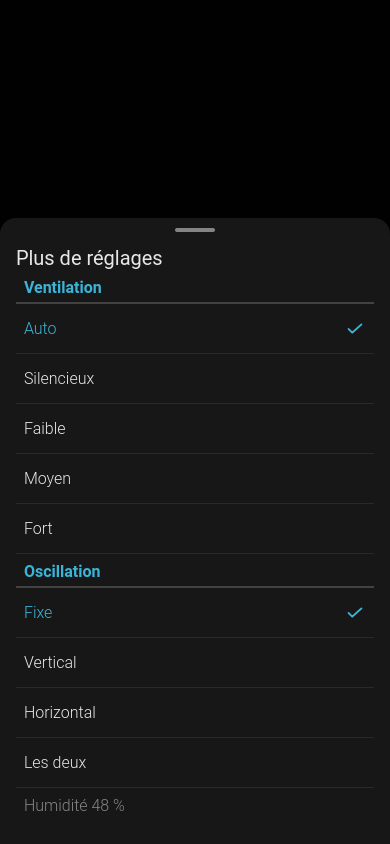 More settings.
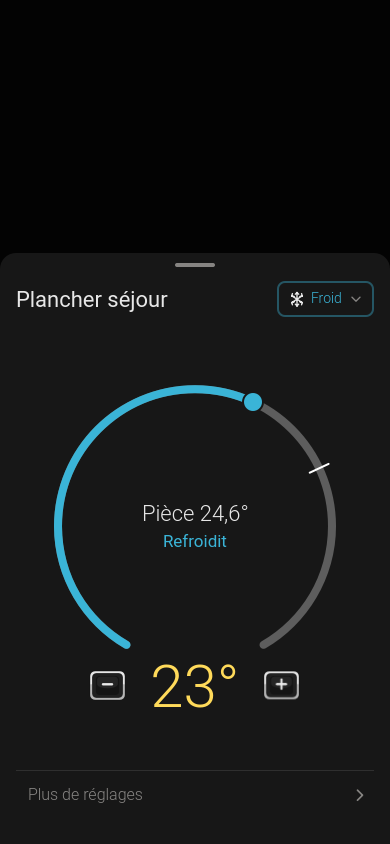 The lounge floor.
On a computer, the same list and a dialog in place of the bottom sheet:
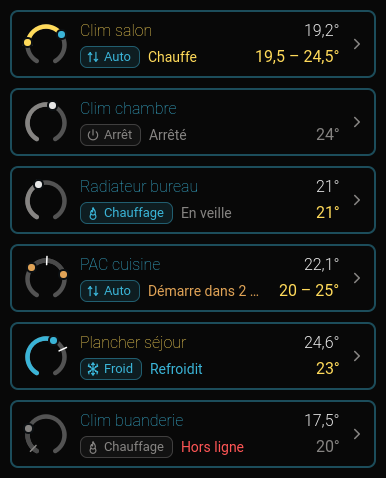 The list, desktop version.
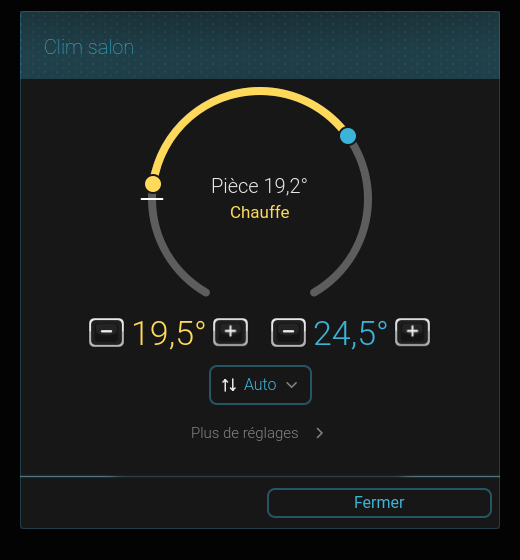 The settings dialog.
Wall panel
On the wall panel (see Remote UI), the content depends on the size of the widget in the grid. In Calaos Installer, add a widget of type Climate and link it to the device.
Small widgets (1×1, 2×1, 1×2) show the room temperature, the setpoint, the icon and status word, and the name. There are no − / + buttons: a tap opens the full-screen view.
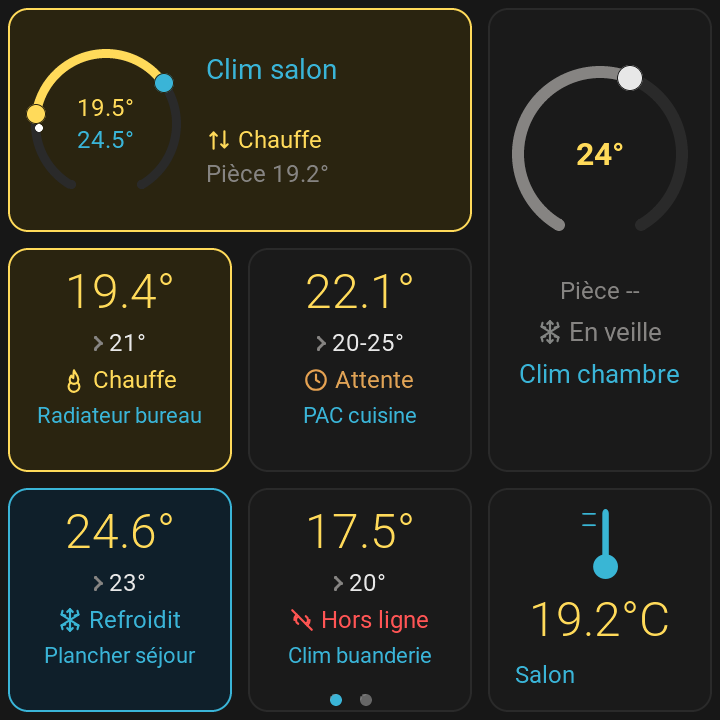 Several small widgets on a wall panel page.
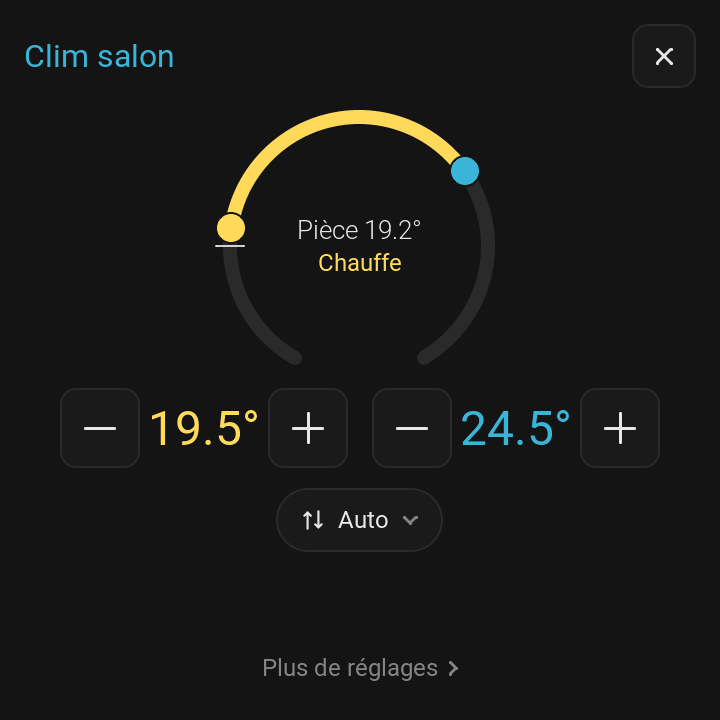 The full-screen view: dial, setpoints, mode pill, More settings.
The mode and the settings open in stacked popups:
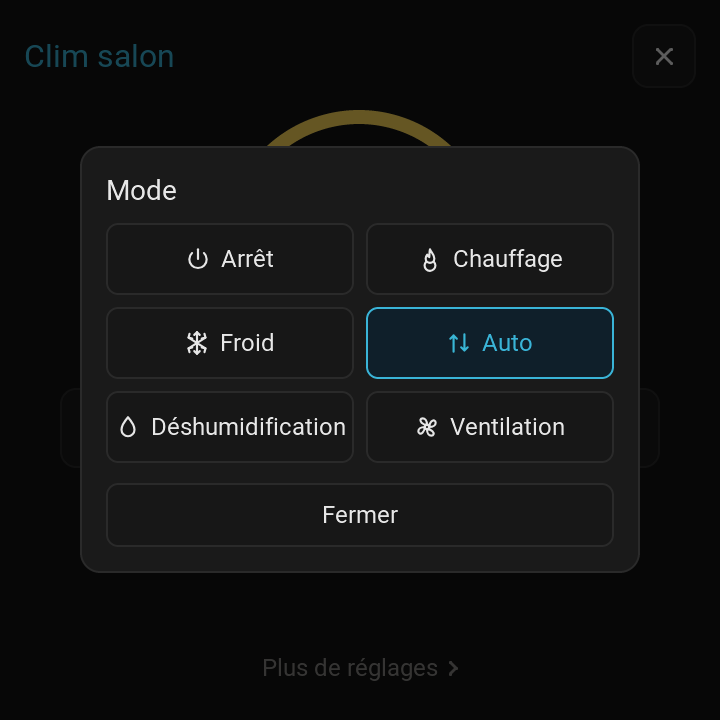 The mode choice.
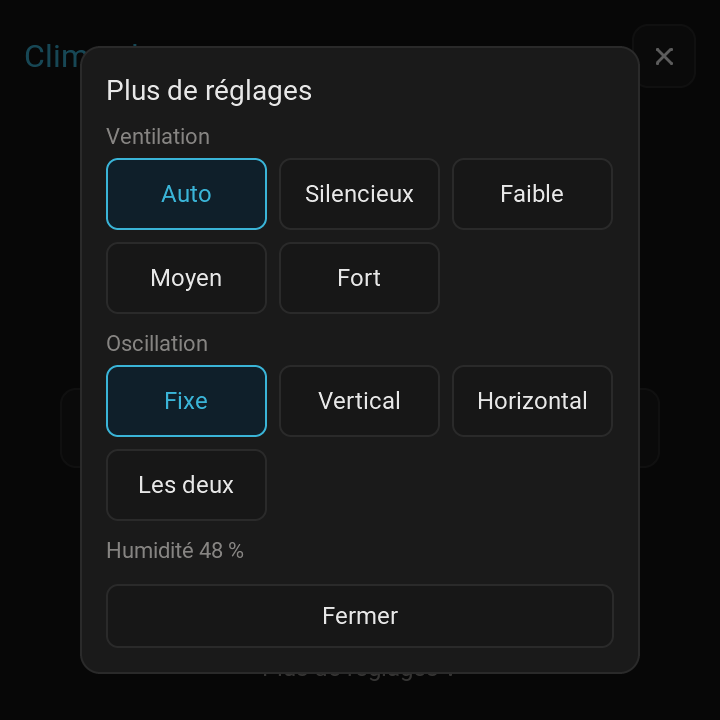 More settings.
A large widget (2×2, 3×3 and up) holds the whole climate, with no intermediate view: mode pill and ⋯ at the top, dial and − / + buttons in the middle, the name at the bottom like other widgets.
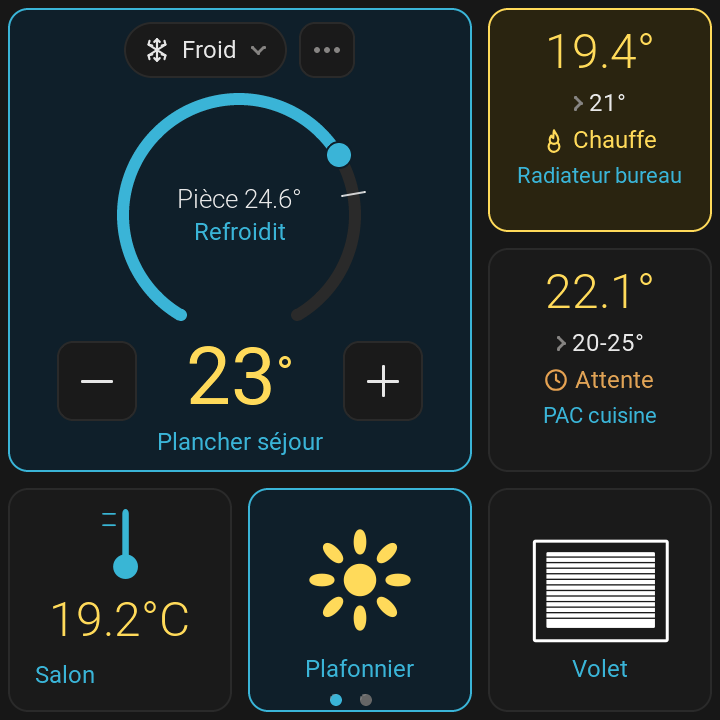 A 2×2 widget.
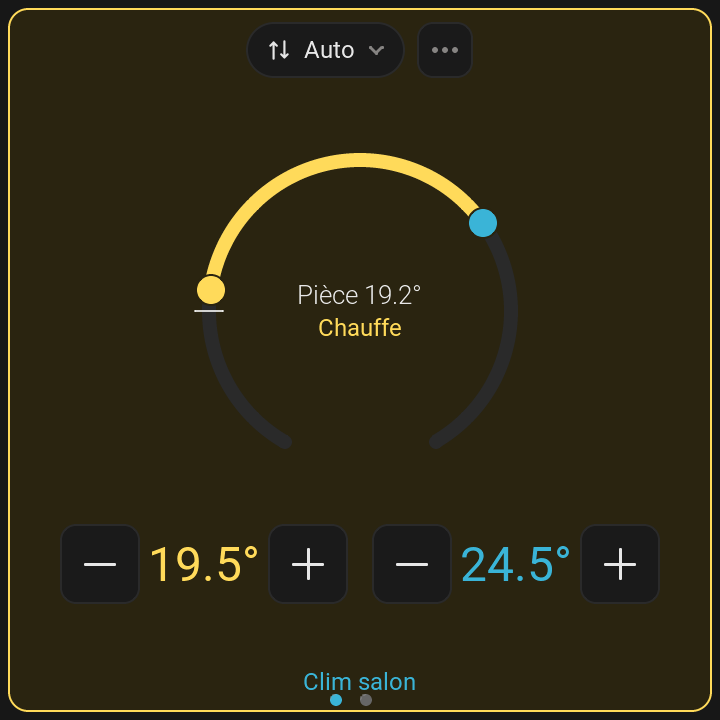 A 3×3 widget in auto mode.
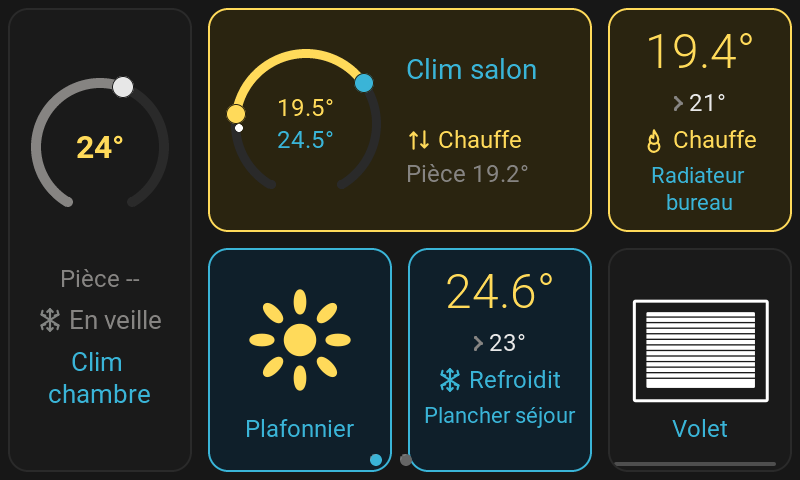 On an 800×480 panel.
If a widget linked to a climate shows a red “Unsupported”, it is a widget type the panel software does not know: see Troubleshooting.
The MCP assistant
The Calaos MCP assistant (a sidecar of Calaos Server) sees a device as an ordinary IO whose value is the mode. It can command it with set_io_state, in simple mode (off) or in JSON ({"mode":"cool","target_temp":24}); the tool description lists the fields of each device. It can also read the whole device object (capabilities, state). A thermostat’s relays are hidden and cannot be written: the assistant sets the thermostat, never its outputs.